Showing posts with label no-sew. Show all posts

8.03.2010

Quite a Pair - Of Chairs!


Have you ever wondered WHO actually picks up the crap people leave on the side of the road with a "FREE" sign?
Yeah, well, I am one of those people. 
And in our neighborhood, people do it all the time. And sometimes its pretty nice stuff.


On the very day I saw this tutorial on Elsie's blog, I found a chair on the side of the road.
It was equally as sad as the one pictured, but I didn't draw a smiley face on mine.


I patched the hole with duct tape and dissassembled the chair, which was pretty easy since the directions are printed on the underside of the seat.  Unfortuately, the top of the chair wouldn't come off, the screws were rusty and bent, so I just covered it with a plastic bag.


Then I painted it with Krylon in a nice aqua blue. My plan was to make it opposite of this chair, so both Goose and I can have a seat in my craft room.


I found this rusty red cotton fabric at JoAnn's. It's the same kind of fabric I used for the first chair, only a different color. The reds aren't quite the same shade, but I like the way they look together. I used my glue gun to attach the fabric to the chair. I carefully folded the fabric and glued it in place.

The pillows are from Dollar Tree.  With some left over fabric, I sewed a few rosette flowers and attached them with my glue gun.  I don't know where they will end up, but I thought they looked cute in the pictures.
Thanks for looking!

6.17.2010

An Un-Blogged Craft Project


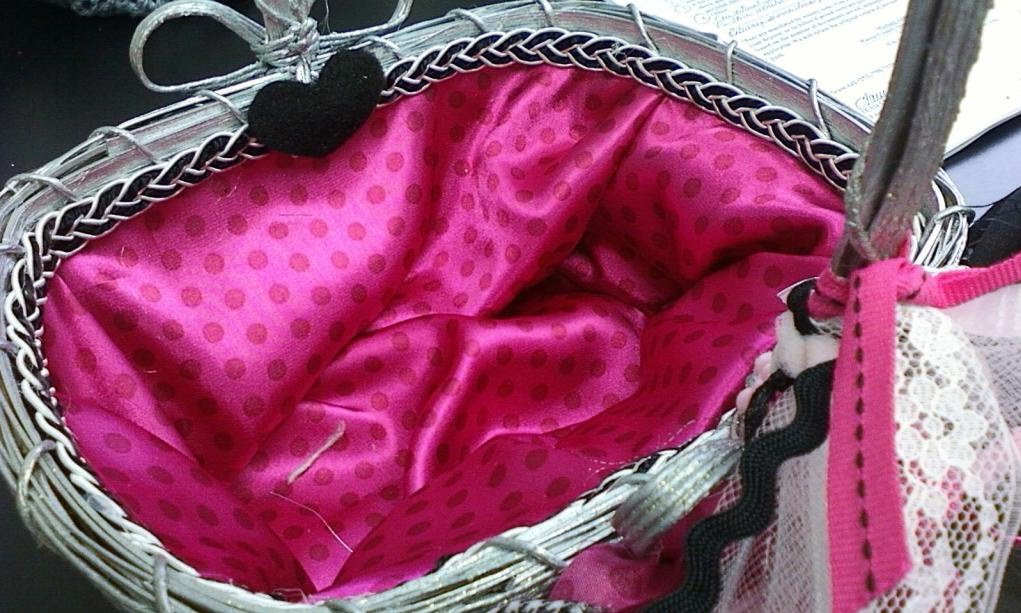
My craftiness is well known in the family and my skills are frequently recruited.  For the last wedding it was the beaded wine glasses for Tara's wedding and this time it was flower girl baskets for Cherish's wedding.  I got to make two of them and her wedding colors were some of my favorite colors to work with.  Pink and Black. Yummm. 

My mother in law and I went to Joann's to pick out the supplies, found cheap baskets, and spent too much on fabric.  I have a very shabby chic/unpredictable/vintage kitchy type style.  The general idea I had was to sew rosettes out of the various fabrics and attach them to the front of the baskets.  And for the inside, I glued in a fabric lining with the polka dot fabric.


I used the braided ribbon to cover the seam of the lining and the heart is to cover the part where the ends of the trim meet. Hot glue guns are amazing.  Invest in a good one, its totally worth it!


Once the flowers were glued in place, I used various sparkly embellishments for the centers of the flowers.  Then I added ribbon to the handle.  I only decorated the front, since that was the only thing people would see. 

And both of the girls did wonderfully.  They were too cute. And of course, were bestfriends before the weekend was over.


Both Goose and Naia got to keep their baskets.  I didn't add anything wedding specific to them, so they can be used again.  I'm thinking next Easter, perhaps?


PS - Sorry the pictures of the basket aren't better.  Camera situation is complicated right now. Taking pics on the cell phone is just easier.

1.17.2010

Craft Break!

I've been cleaning all day.

Well, Hubs let me sleep in ('till 11! Whoo!) and I have been cleaning non-stop since getting up. Mainly hauling my craft stuff back up to my craft room (I tend to migrate downstairs cuz I get lonely up there all by myself!) and packing up Christmas decorations. I know, I know, Hubs and I are HUGE procrastinators but the tree is out on the curb and the decorations are packed up. Except for the ornaments. Gonna wait 'till Goose is in bed to pack those away. Its a job easier done without a toddler "helping."

So while folding laundry I found this shirt that apparently Goose took the scissors too. She cut a hole right in the middle front of the shirt.

Photobucket

And then I decided to take a craft break, since the shirt caused a light bulb to go off in my head. I knew just how to fix it! No sewing required and done in under 15 minutes. All you need is some Heat-n-Bond, fabric scraps and an iron (and scissors and a pencil or crayon, thats what I used!)

Photobucket

#1 - Cut out fabric and Heat-n-Bond paper and attach as per the directions on the Heat-n-Bond.
Photobucket

#2 Let fabric cool then sketch your design onto the back of your paper. Cut out.
Photobucket

#3 Again, following the directions on the Heat-n-Bond, attach your fabric to your shirt.
Ta-Da!!
Photobucket

Cute, easy and you'd never know there is a huge hole under there. And Goose was pleased. She thinks I am the "Best Mommy in the WHOOOOLE World" when I make her stuff.

The strawberry fabric is vintage sugar sack fabric and the green corduroy is scrap from a vintage skirt I altered. Both fabrics are from Fun Junk!

Photobucket

ETA - the model/culprit!
Photobucket
Related Posts with Thumbnails