Showing posts with label painting. Show all posts

9.03.2010

Keeping Busy

I haven't been blogging,
but I have been trying to keep my little hands busy in other ways.
 
I made some art for my walls.

I made a rediculously large flower brooch for my jacket.

I made this chalkboard thought bubble. 
I'm going to make some more for a back to school themed photo shoot.

And then I made these feather earrings.
I saw a friend wearing a pair and the next day,
I was at Joann's and found the feathers on sale for $.99.
It was meant to be!

I have a few other crafty projects planned for the weekend.
They include painting a mirror for Goose's room,
more feather earrings
and a photoshoot.

Oh, and I am getting a bed!
YAY!
Thanks to @joeltelling!!
He is an awesome photographer, super dad and great friend.

And we are having a BBQ with some out of town friends we haven't seen in ages.

And its a three day weekend.

Do you have plans???

8.03.2010

Quite a Pair - Of Chairs!


Have you ever wondered WHO actually picks up the crap people leave on the side of the road with a "FREE" sign?
Yeah, well, I am one of those people. 
And in our neighborhood, people do it all the time. And sometimes its pretty nice stuff.


On the very day I saw this tutorial on Elsie's blog, I found a chair on the side of the road.
It was equally as sad as the one pictured, but I didn't draw a smiley face on mine.


I patched the hole with duct tape and dissassembled the chair, which was pretty easy since the directions are printed on the underside of the seat.  Unfortuately, the top of the chair wouldn't come off, the screws were rusty and bent, so I just covered it with a plastic bag.


Then I painted it with Krylon in a nice aqua blue. My plan was to make it opposite of this chair, so both Goose and I can have a seat in my craft room.


I found this rusty red cotton fabric at JoAnn's. It's the same kind of fabric I used for the first chair, only a different color. The reds aren't quite the same shade, but I like the way they look together. I used my glue gun to attach the fabric to the chair. I carefully folded the fabric and glued it in place.

The pillows are from Dollar Tree.  With some left over fabric, I sewed a few rosette flowers and attached them with my glue gun.  I don't know where they will end up, but I thought they looked cute in the pictures.
Thanks for looking!

6.22.2010

Introduction: The Summer of BIG Things

I know I normally post tutorials on Tuesday,
and I will continue to do so, but I wanted to take today to introduce you to my latest endevor... re-decorating my home!
Well, I guess it's not really re-decorating if it's never been decorated in the first place, right?  All my decorations and nick-knacks and what-nots were still at the old house.  With the exception of some large picture frames, pretty much all of my "decor" items were lost.  So, I have to start over. Fresh. From scratch.  Not that I'm complaining, its actually really exciting to have a clean palette to start with. 
I've had many "ideas" of what I want to do with my home.  Although, none of them have really been cohesive and I have been reluctant to start on anything.  That is, until the May, 2010 issue of Martha.  The COLOR issue. My ideas were inspired! And when ideas become inspired, for me, thats where the magic starts to happen.  Where the pen comes out and scribbles endless ideas and sketchs in my notebook. 

I finally have direction for my living room, my kitchen... I'm so very EXCITED! And Goose's room, I kind of already mentioned the RED vintage chair. (I am slowly gathering supplies. I found two matching twin duvets in the PERFECT color scheme.  One for the comfortor, and one to make some curtains and pillows, with help of GG, I hope...) Anyway, this isn't about Goose's room today, its about the total house make over. And Martha...
It's heavenly!
Everything I dreamed of, but could not put to words.
The color palate...
That blue!! Oh, that wonderfully striking deep muted blue. 

This color palate is everything I have been looking for. 
From the yellow, to the peach and the blue...
We own an antique china hutch that is very dated.
I have been wanting to paint it blue for a loooooonnnnngggg time, but haven't found the right shade.
In my head, I saw it... but everything I looked at was either too "primary" or too green.
This blue though, perfection.

I think I may paint my coffee table the same color.

So this summer, that is my plan.  Re-vamp my whole home. And on the cheap.
Furnature won't be too much of an issue. We have some good pieces that just need some paint.
Anyone know where to get a couch cover for a sectional couch?
We have a wonderfully retro ::sarcasm:: couch that has seen better days.
It's the best nappin' couch around, but...
it's UGLY!

This summer, my Tuesday posts will most likely be design related.
Housewares, decor items and the like.
There might be some other crafts mixed in.
I miss scrapbooking so much, but that is a post for another day. 

So, stay tuned. Not only will I be sharing my own projects.
And I will *try* to remember the BEFORE shots this time!
I will also feature cute tutorials as always.

I'm so excited to finally be inspired enough that I'm no longer afraid to paint my furnature. 
I have a plan and I know I won't regret it!


6.04.2010

Painted Shoes #FAIL

Not all craft projects work out. 
Even when you follow the directions to a T.


I bought some shoes for $5 at Goodwill.
I painted them bright green.
Used primer, couple coats of paint and a couple coats of sealant.
Waiting between each step for them to dry.

They looked great.
Until I wore them for the first time.


*Sorry for the crappy pics, I'm limited to my cell phone at the moment.*

Not sure what I did wrong.
Should I have used Modge Podge instead of acrylic sealer?
I thought about sanding the shoes first with fine grain sandpaper to rough up the leather to make the paint hold. 
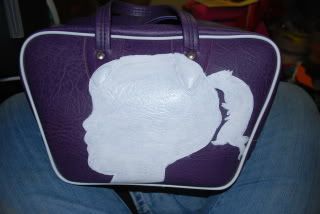
Or I wonder if I tried the same technique I used to paint my vintage bag.
I haven't had any problems with the paint chipping off the bag.
BUT
Purses don't really endure the same wear and tear as shoes.

I definately want to try this again, with a little tweaking.
And I want to try out Kathleen's other Shoe Re-Do's as well.


3.10.2010

Product Placement Thursday!! Beauty Review.


Yes, I know its not Thursday yet.
Deal with it. 
Cordially, KelsyC

Recently, I've become slightly obsessed with nail polish.  
Never in my life have I ever been this diligent with making sure they are painted.
I'm just way to lazy AND I never really cared.
But now my philosophy is
short, trimmed, and changed often.  

I don't care if its expensive polish or the $.99 stuff! I just love color.
And lots of it! Matching or not.  Whatever fits my mood.
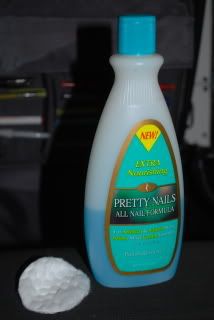
And I discovered a product that has become INDISPENSABLE during my nail polish adventures.


Let me tell you, this stuff is AH-mazing!!! It's a little on the expensive side but worth every penny.
One quick coat makes ANY nail polish virtually indestructible.
Even the cheap stuff.  
And it dries ANY polish in 2 minutes or under!

That means I can go almost a full 7 days (okay, really more like 5) with a next to perfect manicure.
Which for me, is great.  
10-15 minutes to remove the old coat and put on a new one.
Add the top coat.
Wait two minutes.
Dry.

You can even go to bed within 30 minutes of painting, and with the top-coat, 
NO smudging!!!

So for a lazy, unmotivated, time-crunched mom, this stuff is perfect.
It also works nicely for wiggly toddlers who want their toes painted
BUT don't want to sit still long enough for them to dry!


**I am not paid for any product reviews!**
Any product opinions are based on my true feelings.
I am not paid or compensated in anyway.
However
Should anyone want to send me products to review, I will do so gladly.
And I will make sure to notify my readers as such.


3.09.2010

Style Muse - Gil Elvgren

As you all know,
I love anything vintage.
Marilyn Monroe, classic curves, old school pin-up models...

And no one did it better than Gil Elvgren.

He got his start in the 1930's and quickly became one of the most widely recognizable and revolutionary artists of his time.  His unique technique of photographing his models and then hand illustrating his pin-ups created remarkable, one of a kind collectables, sought after to this day.

Though he was most famously known for his pin-ups, he also did quite a bit of commercial work for companies like Coca-Cola and by the 1950's he was being published in mainstream publications like Cosmopolitan, McCall's and Good Housekeeping.

While many have tried to duplicate his artwork, no one was able to depict women with such beauty and grace.  And what some find as objectifying, I see it for the art it truely is and as a celebration of feminity for ages to come.

For more information on Gil Elvgren, visit his website!

Image Source
Google Images

10.21.2009

I crafted, thankyouverymuch.

And I even decided to take a little time to put together a little tutorial for y'all.  

Step #1
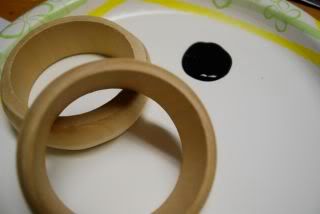
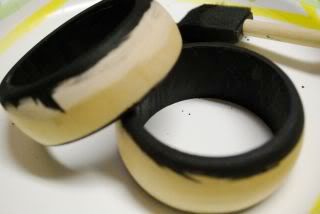
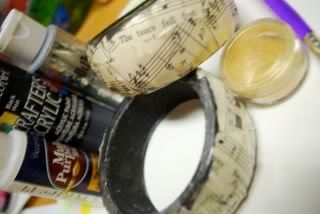
Paint the inside and outer edge of the bracelet. You can paint the whole thing, but I am lazy and it will just get covered.
Photobucket
Photobucket

Step #2
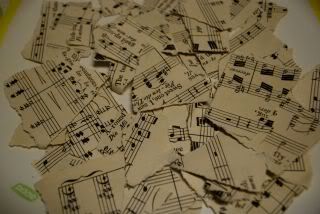
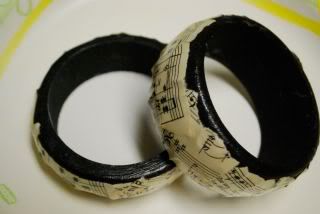
Tear patterned paper (I used vintage sheet music) into small bits and apply with Modge Podge. Apply liberally and coat one additional time after the first coat is dry. I only attached my paper to the part of the bracelet that was not painted, leaving a bit of paint showing on the side.
Photobucket
Photobucket

Step #3
Using silver paint and gold Pearl-Ex (cuz I couldn't find my gold paint) I lightly dry brushed one bracelet with silver along the edges and rough parts. I did the same technique with the Pearl-Ex but mixed it with a bit of clear sealant. Get help from a Goose.
Photobucket

Step #4
Allow to dry. Once gold/silver paint is dry, apply a multi-purpose sealer to the entire bracelet. One-two coats is more than enough. Dry overnight and wear with some fab accessories tomorrow. Give the other to a friend, cuz she'll love it!
Photobucket

Modge Podge will also work as a sealant if thats all you have.  But I find that sometimes it can remain a little tacky, even if "fully dry" so I like to add a multi-purpose sealer (found with the rest of the acrylic paints) on the top.  It adds strength to the bracelet (which you should still try NOT to get wet) and will get rid of any tacky-ness from the MP.

Photobucket

PS - As always, with Modge Podge it is always best to let your project sit and dry overnight! I cannot stress this enough.  The paper will bubble and curl and won't lay flat when its wet.  It just won't, no matter how much you mess with it.  98.9% of the time, after my projects dry overnight, the bubbles and wrinkles have worked themselves out.  And if they don't then you pull out some ribbon or some embellishments and you cover it and make it pretty!!!

4.02.2009

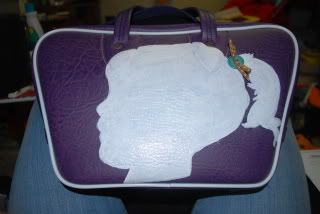
Upcycled Vintage Leather Bag Tutorial

This is the first time I have ever done a craft like this.

Photobucket

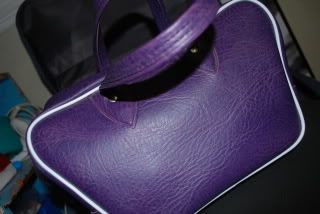
I have this fabulous vintage bag that I got a while ago (for $4 from Fun Junk, my favorite-est place EVR) but I've always thought it needed a little sass. So I turned to my trusty internetz friend Google and searched "painting leather" and came up with several great links.

I especially like this one.
This one is pretty good too.
There is some useful information in this link as well.

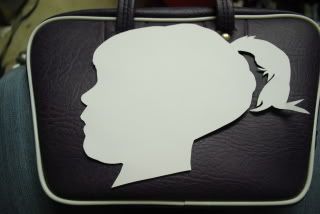
1. Decide on the image you want to paint. I wanted to use a silhoutte of Goose. Let me tell you, getting her to sit still for the pic was probably the hardest part! I printed out the image and cut it out.

2. I didn't have any leather cleaner at my disposal but in one of the many links I visited yesterday I recall one saying you could use acetone (the main ingredient in fingernail polish remover). Since all I had was nail polish remover, thats what I used. I put some onto a cotton pad and lightly cleaned my work area.
Photobucket

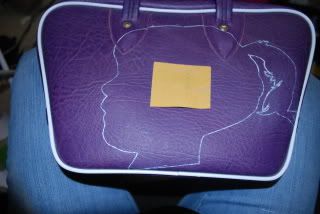
3. Place your image and trace it onto the bag. (If I could have found my clear contact paper, I would have cut a stencil, I think the painting would have been easier that way.) I outlined my image in a white paint pen.
Photobucket

4. Gently scuff up the area you wish to paint with a fine grain sandpaper. This will help the paint stick.
Photobucket

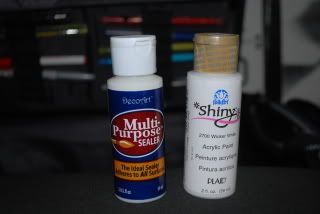
5. Apply a thin base coat. I found a multi-purpose sealer made by Deco Art and a white water-based acryilic paint for porus surfaces made by Folk Art. I mixed equal parts of paint and sealer and made a base coat. This sealer is specific for adding "maximum adhesion" to acryilic paint when mixed and is a sealer when used by itself.
Photobucket

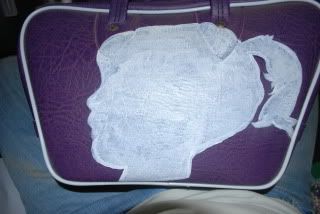
6. Apply 2-3 coats of the paint/sealer mixture depending on your desired coverage.
Photobucket

7. Apply one coat of sealer only.
Photobucket

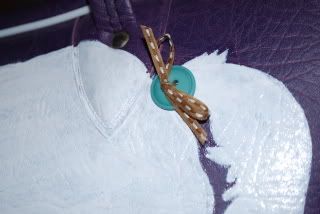
8. Embellish (and let paint dry overnight)
Photobucket

9. Enjoy!
Photobucket

Since this is the first time I have ever done this, I'll keep you updated on how the bag holds up. I can tell you that I have done some "product testing" myself, including a scratch test and water test, and it seems to be hunky dory!

TFL!

Photobucket
Related Posts with Thumbnails